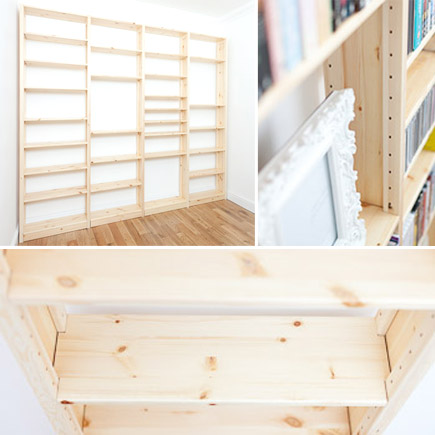
 If you work from home, or you’re lucky enough to have a room set aside for your hobby, over time you might find that this room becomes a dumping ground for all kinds of kit. Workshops, garages and craft rooms aren’t public spaces in the home, so even in the tidiest home they tend to attract clutter. Before you know it you can’t work in your workshop because every available flat surface is piled high with scraps of fabric, boxes of tools or engine parts. Dealing with crafty clutter can be tricky, because it is all necessary for your work or hobby. But where does it all go? And how can you turn a messy craft room into a practical, peaceful workspace where everything has its place?
Starting with shelving
A simple bespoke shelving solution is a great place to start. Choose a wall free of radiators, windows doors and other fixtures. Don’t worry if there’s furniture up against that wall already: you can stand a desk or bench in front of your finished shelving to conceal less frequently used items on a lower level. An entire wall of shelving is a great way to make space, and it’s a far more elegant solution than several mismatched racks of shelving, which is the standard workshop style.
Reach for the stars
Consider going for a floor-to-ceiling solution rather than a low or mid-height shelving unit, even in a room with high ceilings. Not only will it create a few more shelves to increase capacity, it avoids wasted space and create visual cohesion. If the ceilings are high and you’re concerned about reaching the top shelves, invest in a good step-stool or low ladder and stack the top few shelves (remembering to fill shelves from bottom to top) with decorative items, or boxes of things you won’t need to use very often: spares, old unfinished projects, or storage from elsewhere in the house A bespoke built-in is anchored securely to the wall, avoiding the risk of instability, so you can afford to go all the way to the ceiling, a key advantage over free-standing shelving solutions.
Out of sight, out of mind
If you’re concerned about the visual effect of a wall of clutter, choose closed rather than open shelves with a DIY clutter-covering solution. Fabric is a simple and striking solution: mount an attractive curtain or pair of curtains across the span of your shelves, and slit it neatly in the centre of each unit for easy access. You can rig up a DIY solution if you’re handy with a sewing machine- check for a tutorial online- or buy a pre-made pair of curtains from a big-box store. Lightweight paper or fabric blinds are easy to mount above a shelving unit, and have a more modern, straight-line aesthetic for a workmanlike room.
Alternatively, if you’d rather not risk fabric floating about in a workshop or have small children crawling about who might pull floor-length curtains down, note down the dimensions of your shelves instead and invest in a set of matching crates or boxes to corral the clutter. Choose transparent boxes to make it easy to see what’s inside, or set to it with a label-maker once you’re all boxed up.
Author bio
The author is a real homes blogger who writes about beautiful homes on a budget and keeps a real renovation diary. She visits Shelfstore to design her dream shelving system.
